How's it goin', eh?
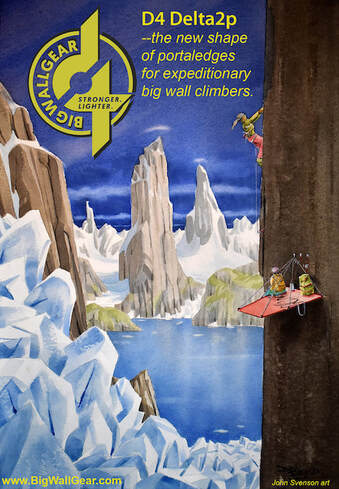
Hayden Robinson and I used the new Delta2p portaledge in October 2020 on the climb Hockey Night in Canada on El Capitan in Yosemite, California. The Delta2p is the new ledge with the cantilevered design, and I’m going to give you the run-down here. [Ed. Note: The cantilevered design means that the ledge sticks out from the wall at 90 degrees to the traditional ledge setup, so the narrow part of the ledge - not the wide part - is against the wall.]
Hockey Night was my 63rd different El Cap route, with our final bivy on the wall being my 800th night spent on the side of El Cap - not counting base nor summit bivys. I would guess I have spent the last 200 nights or so sleeping on D4 portaledges made by John “Deucey” Middendorf, helping to break them in and making sure they are the best they can be before they go out to market. My specific instructions were to “abuse the hell” out of the ledges in the real world - which I most assuredly did - so what I write to you now is not Big Wall Theory, but tried-and-tested Big Wall Fact that has been forged in the granite crucible.
I first tried out the D4 Delta2p ledge with my partner Debbie Fowler a year ago in Middendorf's factory in Tasmania, Australia. I was impressed with its narrow profile and stability. Amazing to me is the fact that you can stand comfortably on the outside end of the ledge without causing the ledge to tip. This was unexpected as you would think it might slip, but it doesn’t.
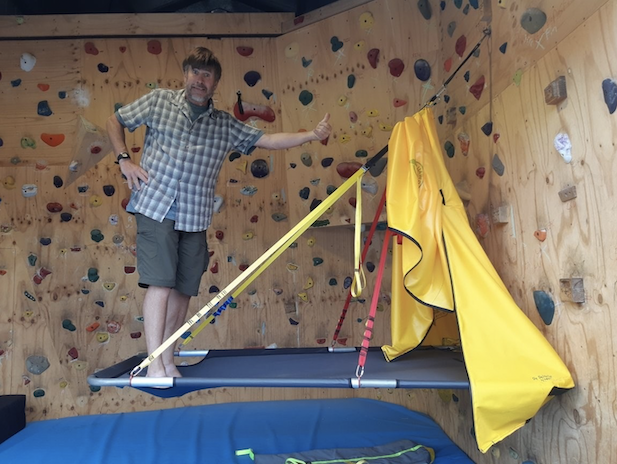
"Yup, you can do this!" The author Peter Zabrok testing the new D4 Delta P2 design. Photo Credit: John "Deucey" Middendorf
I figured the narrower profile of the Delta2p ledge against the wall would be an advantage when camping on anchors without enough horizontal spread. Think about it – the ledge is turned 90 degrees from a regular ledge, so if you are stuck camping on a narrow array of bolts, the suspension point will be less offset. Inside of John's factory, it made sense for two people to sit side by side, with our backs against the wall as a handy backrest. This is how I envisioned using it.
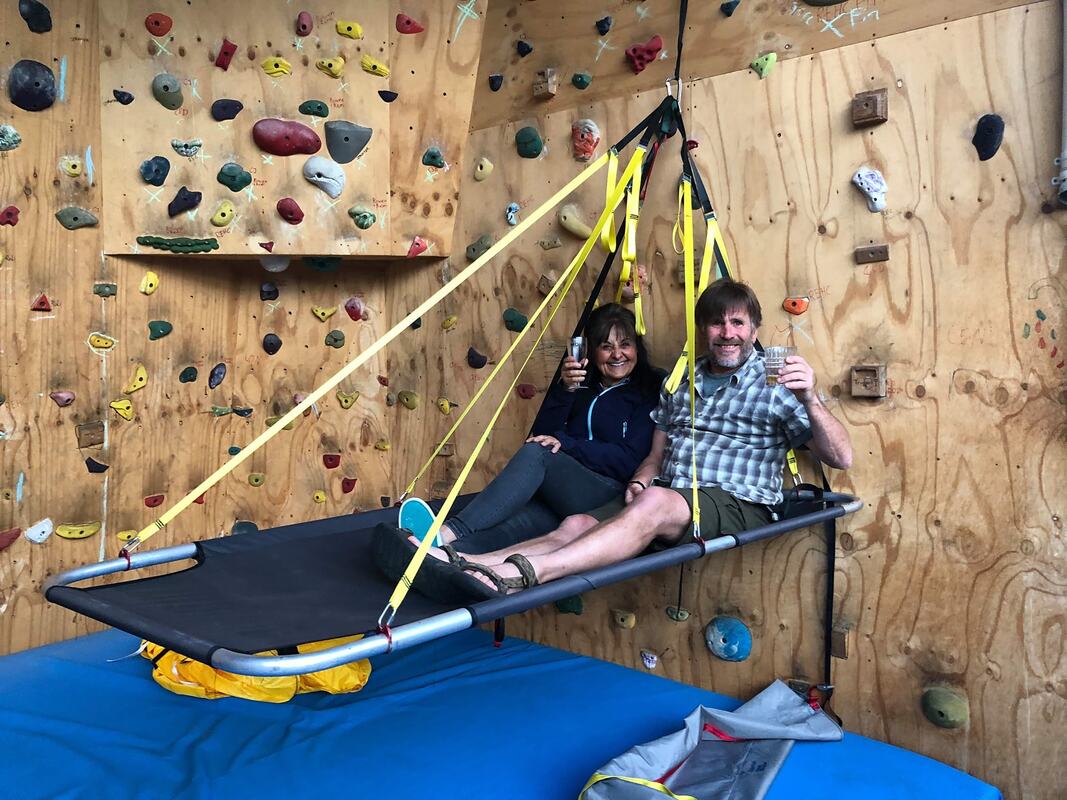
"You can use the wall as a backrest - at least in theory... "
Peter Zabrok and his significant other Debbie Fowler testing out the Delta2P portaledge in John Middendorf's factory in Tasmania. Photo Credit: John "Deucey" Middendorf
|
Now let’s flash forward from the austral summer to whatever the hell you call summer up here on the normal side of earth, where the water in the sink spirals down the drain counter-clockwise. Once we got the Delta2p ledge onto the big wall, I can say with certainty that it was the easiest ledge to set up and take down that I have ever used – and I’ve used them all. In my experience, no other ledge even comes close – the bloody thing practically assembles itself. One of the reasons is the superbly crafted male-female connections using the D4 Bullet Joiner which allows the two tubes to fit together quickly, easily, and intuitively. If you are familiar with D4 ledges, then you know they don’t have square corners like traditional ledges, where you have to fit two tubes into some sort of square corner piece. Instead, the “corners” of the D4’s are round – like architectural aluminum railings – and the connection points are straight inline along the edges. “The bending of high alloy, thin-wall aluminium tubing is actually quite an art,” writes Deucey. So, when you are setting up the ledge, all you have to do is line up the tubes, and in goes the Bullet Joiner - easy peasy. The rounded end gives you a lot more maneuvering room during insertion than the tubes you’ve been fighting with for years. Notice the hole in the top of the bullet joiner - this is for the quick link that attaches the ledge suspension strap to the ledge. Clever, eh? |
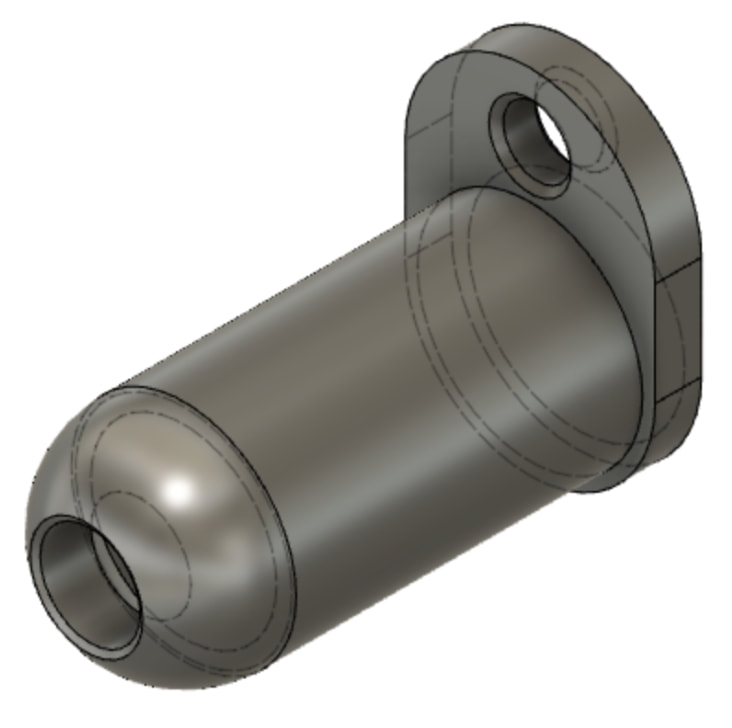
The D4 Bullet Joiner practically assembles itself – the best ledge tube connection device ever! Photo Credit: John "Deucey" Middendorf
|
Another thing that makes this ledge so easy to set up, not to mention easy to carry up to the base of the wall and back down from the summit, is the Delta2p is incredibly and unbelievably lightweight. With its fly and storage sack, it weighs in at a mere 6.5 kg = 14.3 pounds, less than half of what those gigantic Black Diamond contraptions weigh. So with the Delta2p ledge and fly packed together in the bag, you are left with a seemingly impossibly small package only 36 inches in length, with an elliptical cross-section about 12 inches wide by 6 inches thick. Can you even imagine a double ledge packed up this small?
Now compare these specs to those big-ass old school ledges, and you know the ones I mean - those monstrosities you have to fight constantly, especially in a bit of wind; the ones you can barely lift because they are so damn heavy; the ones with that super-annoying spreader bar that you are always battling, the greatest retrogression in portaledge design history?! Yeah, those ledges. If you hate fighting those big f*ckin’ heavy-ass ledges, and if you find them as hard to assemble and take apart as I do, then the Delta2p is definitely the ledge for you.
Now compare these specs to those big-ass old school ledges, and you know the ones I mean - those monstrosities you have to fight constantly, especially in a bit of wind; the ones you can barely lift because they are so damn heavy; the ones with that super-annoying spreader bar that you are always battling, the greatest retrogression in portaledge design history?! Yeah, those ledges. If you hate fighting those big f*ckin’ heavy-ass ledges, and if you find them as hard to assemble and take apart as I do, then the Delta2p is definitely the ledge for you.
|
“One tip that often gets forgotten but is especially important with a cantilever ledge,” writes Deucey, “is to ALWAYS clip the ledge into a strong sling suspended to the main anchor, and then backed up with a rope or full-strength webbing. The ledge hangs much better when there is some space between the anchor point and the top clip. In other words, don’t clip the top of your ledge directly to a bolt – leave some space and it will hang better. Doing so also keeps the wall side of the fly from touching the wall, and getting soaked in the runoff that flows along the surface of the rock. All D4 ledges and accompanying fly are designed keeping this in mind.”
Now the big surprise to me once we started climbing was that we rarely sat with our backs against the wall. Why? Well, “against the wall” is where the rack and gear and other stuff is almost always hanging in the way, and besides, the view is too great from the outside end! So basically, I kind of lived on the outside end, and slept with my feet towards the wall. There are three sewn daisies on each of the six straps, and they are in the PERFECT position. I know this because when I was in the factory in Tasmania, I marked exactly where I wanted them, and then John sewed them in place. Correctly placed strap daisies are fundamental to your enjoyment while big wall camping. Without clip-in points on your ledge straps, it just isn't fun, because your stuff always ends up out of reach. Another big surprise was how bitchin' this ledge is to belay from! You can lie down, grab a drink, and get a really great view of what's happening with your leader above because your head is so far away from the wall! The way the straps are designed - with superb buckles and big grab loops on the free-hanging ends - when you want to adjust the pitch of the ledge based on whether you are lying, standing or sitting, it is a quick and easy pull to lower or lift the outside end, even while lying down. And when you want to stand up, these pull straps are exactly where you want them – just reach, pull, and stand. |
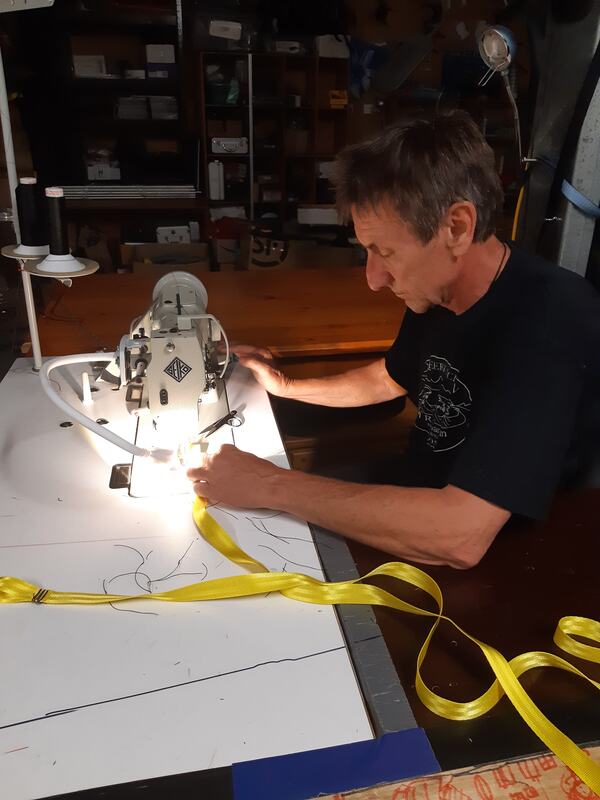
"Good ol’ Deucey!" John Middendorf sewing the clip-in loops on the six suspension straps precisely to Dr. Piton specs. Photo Credit: Peter Zabrok
|
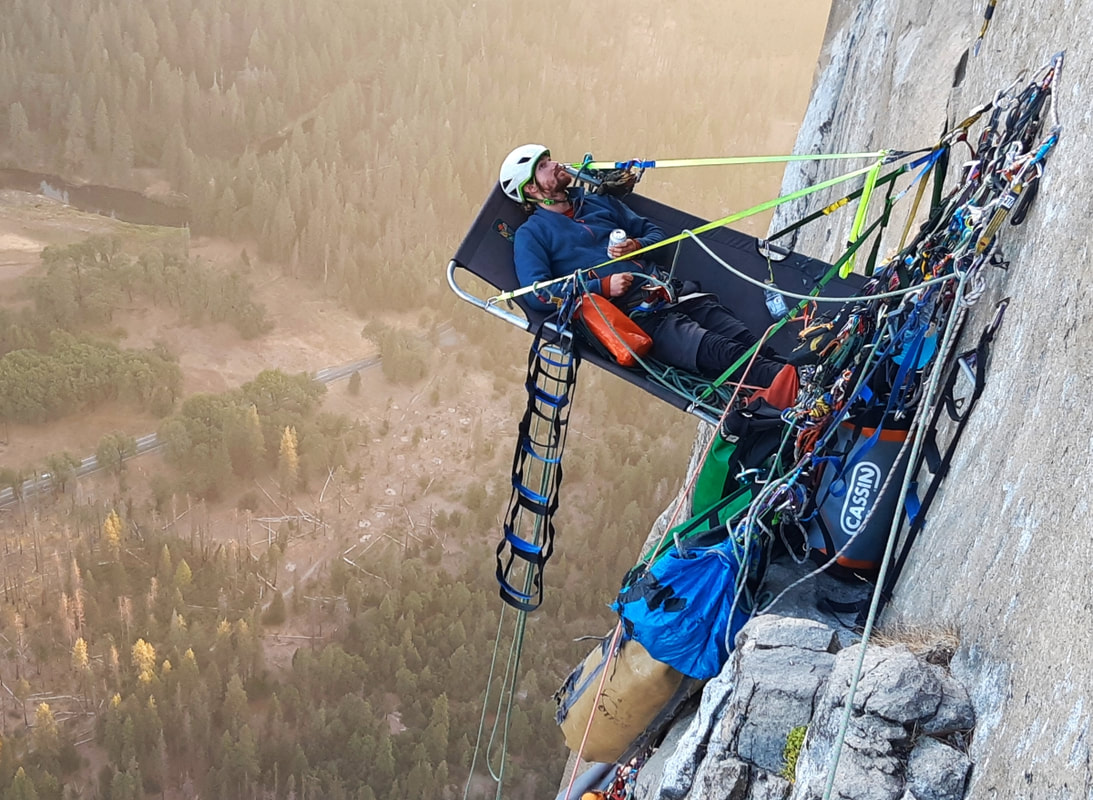
"No more crappy butt shots of your leader above." You
get a superb view while belaying from the Delta2p. Hayden Robinson (IG: @aidlord_) in the photo. Photo Credit: Peter Zabrok
In spite of the ledge being so easy to take down and put away in its storage bag, as always I chose to “flag" the ledge during hauling. What this means is that you attach the fully erected ledge to the tensioned haul line above the load, so that when you arrive at the next belay, you simply detach the ledge from the haul line before docking the pig, and then you have an immediate belay platform on which to relax and get comfortable, instead of hanging in your harness and crushing your kidneys or suffering on a belay seat. How to flag your ledge is described in great detail in my book HOOKING UP – The Ultimate Big Wall and Aid Climbing Manual, and the trick is to have a couple of dedicated Yates adjustable daisies on top of the ledge. Not only does this make flagging and especially un-flagging the ledge a breeze, even in the wind, but it gives you universal positioning adjustment of the ledge at your campsite. Think about it…
Two dedicated Yates Adjustable Daisies on top of your ledge
provide infinite adjustability and an instant campsite. Hayden Robinson (IG: @aidlord_) in the photo. Photo Credit: Peter Zabrok
|
I have flagged various portaledges for well over a thousand hauls, and I can tell you that there is no better portaledge to “flag” than the Delta2p. With its rounded corners and trapezoidal shape - be sure you haul it with the narrow/air side end pointing upwards, duh - it never seems to catch on anything. Even more amazingly, with a round-cornered D4 ledge flagged on your haul line, your pigs will bypass virtually all obstacles, clearing roofs and edges that your pigs would surely get stuck on if you didn't have a flagged D4 ledge attached to the haul line above them. I gotta tell yas, I REALLY love those round corners! The bed edges were properly reinforced, and we didn't get any significant wear from flagging, as it should be.
The only "wear points" we found were on the edges of the ledge, between the middle strap and the wall-side corner strap. This is because you must step on this part of the ledge frame when you step into and out of the ledge. So the new ledges being manufactured now have extra reinforcement right there where you need it. Now the well-seasoned (referring to experience, not smell) wall rat will understand this next bit, but I need to mention it to the tree-dwellers who are living in D4 ledges and helping to save our forests. You need to remember that portaledges are NOT safety devices, like a harness. Ledges can shift. Although these new D4 designs are much more stable than the old school ledges, they can become overloaded if not set up properly, in an optimal location and with the suspension tensioned optimally. Therefore, you can never depend on your portaledge as your primary anchor to the wall, and you must ALWAYS be attached separately to the main anchor. |
Lowering out a D4 Double ledge that is “flagged” on top of the pigs. Note the round corners on the ledge – this allows the ledge to actually deflect the pigs around obstacles like roofs and edges that would otherwise stop the load. Normally I use the excess haul line as a lower-out line, but this was a long haul, so we used a doubled - and hence removable - lower-out line. Photo Credit: Peter Zabrok
|
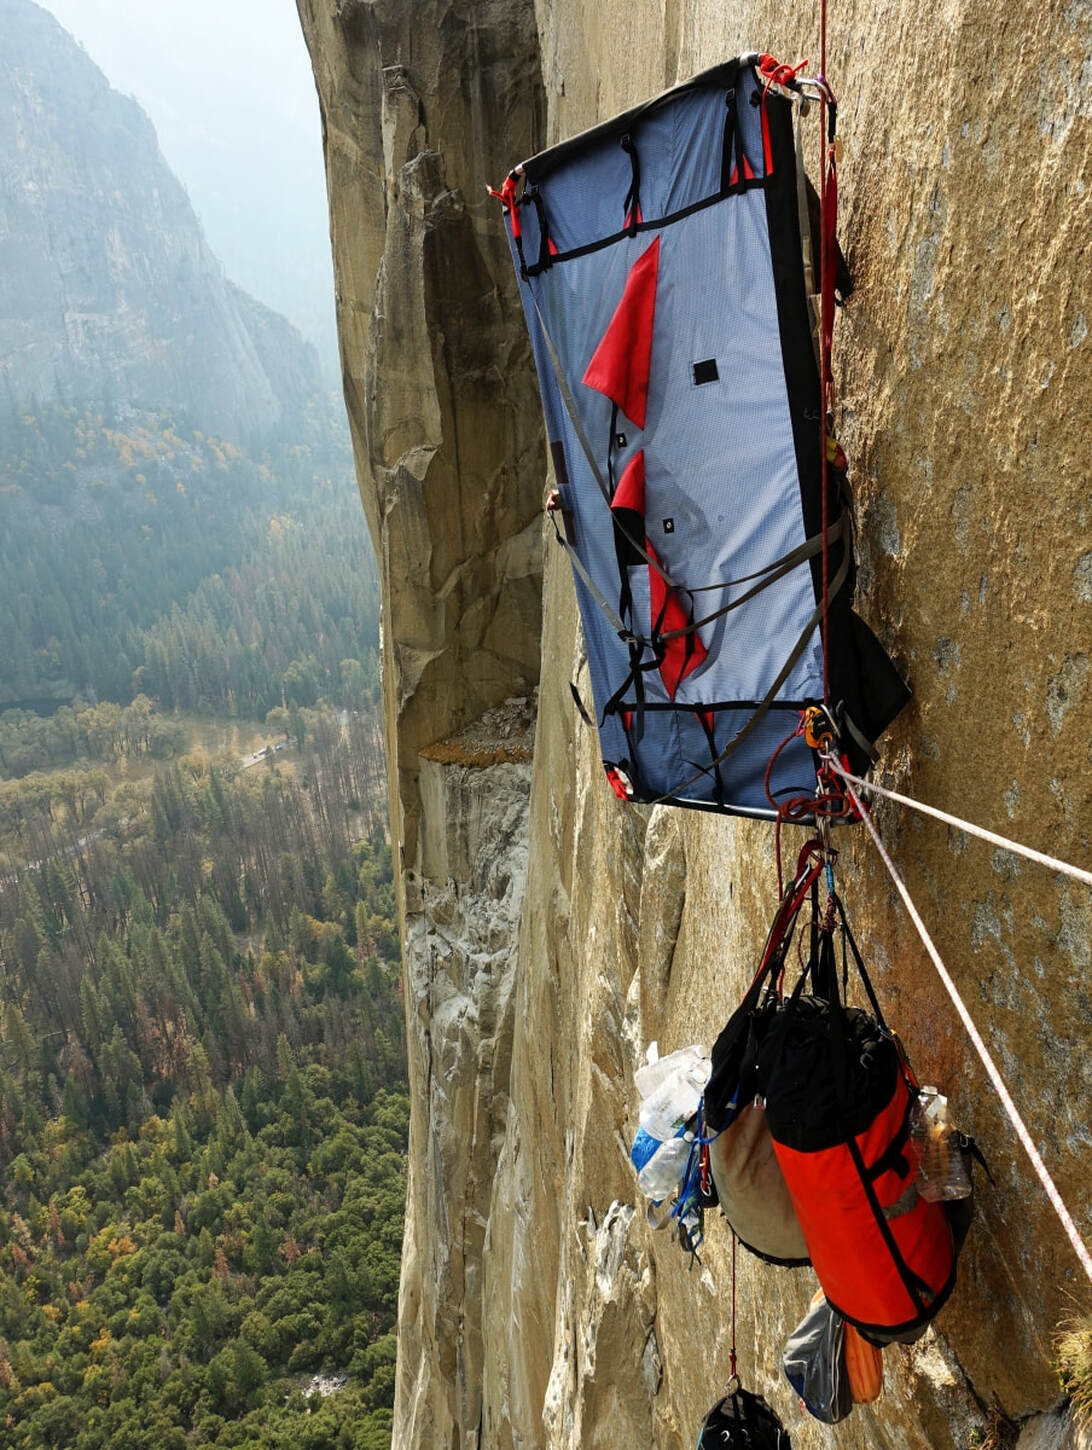
The weather was perfect, so we never deployed the fly, but check out Deucey’s photo below. A few things to note are the full-strength “dogbone” suspension point that goes through the fly, so you don’t have to faff around with your lead rope to make a backup. There is no “tent pole” needed for the inside of the fly, like you use with a traditional double ledge, so a bit of weight and clusterf*ck saving there. There is but a single sealed seam, two waterproof zip doors on either side, and comes with bomber wall-side reinforcement. And the snugly-fitting corner pockets mean the fly will stay in place once and for all.
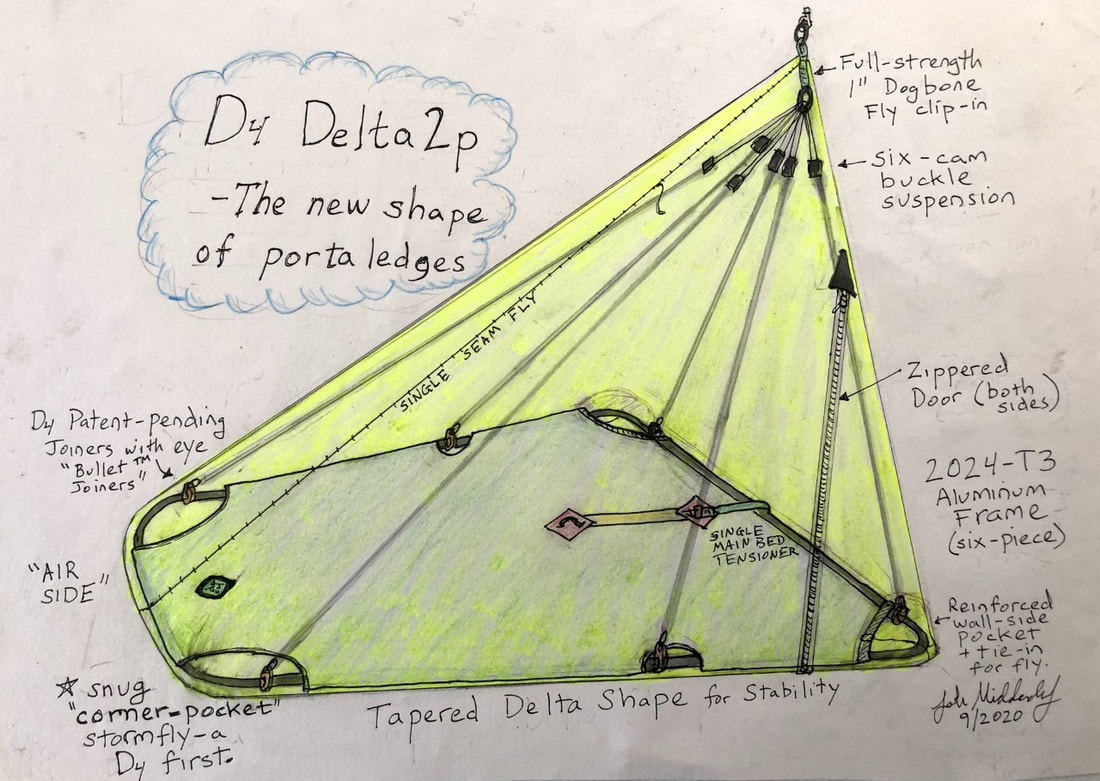
Study this photo, and take a close look at all the fabulous new features on this D4 fly!
It will keep you dry under the harshest and wettest conditions imaginable.
The full-strength “dog bone” clip-in point gives you the correct 'hang.' Photo Credit: John "Deucey" Middendorf
So even though I never used the fly on the Delta2p on Hockey Night in Canada, I did indeed use the fly on my D4 double ledge on previous walls. HELL YEAH, I used the fly, holy frig! Have you ever heard of that climb on the right side of El Cap called the Waterfall Route? Well, I can tell you why it’s named that. The Waterfall Route climbs directly beneath Horsetail Falls, which is usually dry in the fall, unless you happen to get caught in a thunderstorm. The forecast called for a tenth of an inch of rain, and in fact we got over an inch. The waterfall opened up directly on top of us, and it was every big wall climber’s worst nightmare – we got HAMMERED!
But I'll tell you this - the Deucey fly that I was using kept me bone dry directly under the main force of the falls. While my partners were fighting for their lives, kneeling in the water to avoid hypothermia while frantically bailing, I was comfortably ensconced in my D4 ledge while getting pelted by the main part of the waterfall. Yet I remained so dry, I didn't even bother to put my camera into a ziplock bag as it was fine just clipped to the ledge strap. The next day, my partners grabbed all their wet clothing and sleeping bags, and bailed to the base to dry them out in the clothes dryers; I just left everything up on the wall because nothing under the fly got wet. So what you need to know is that your D4 portaledge fly will keep you dry, like no other fly ever made! There could be no worse test, and no better outcome.
|
Now, as for sharing the ledge, there is no shark fin like you find in a traditional double ledge. Deucey has come up with a very simple alternative that you see in the photo - a single removable strap which can be completely removed for comfort if you are on your own, or perhaps if you are with your sweetie. Also noteworthy in the same photo is that the entire bed is tensioned with a single buckle. How simple is that, but it works with the trapezoidal design [think about it]. So, if you’re tired of wrestling with those horrific tensioner straps on your Metolius ledge, there is a better way.
“Another thing I really like about this fly design,” writes Deucey, “is that there are two zippered doors. It’s really good the way you can get in and out without disturbing your partner, or shifting the ledge. This will make a big difference on remote expeditions as well.” So, if you set up the ledge between the two loads docked on either side, which easier with the narrow cantilever design, then each partner has direct access to the top of his own pig, without making the other person have to do all the work. |
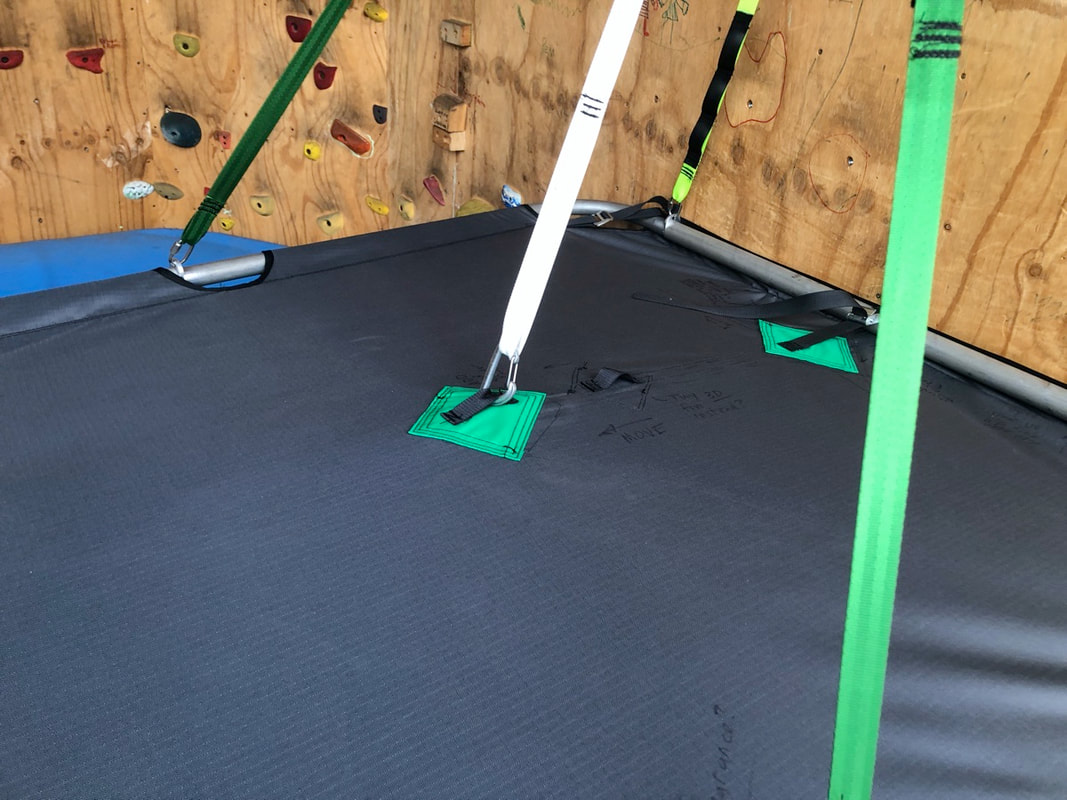
Close-up of the bed – note the removable divider strap,
and the single tensioner buckle against the wall. Photo Credit: John "Deucey" Middendorf
|
Now the million-dollar question - do I prefer the regular D4 double, or the Delta2p? That's a tough call. I only shared the Delta with a partner for a single night, and we slept with our heads at opposite ends, which is not how it is designed. The prototype I was using had no separation strap, and it was definitely a bit “cozy” for two grown men. Certainly, the Delta2p is the ultimate “Couple’s Ledge,” however. And, if I were soloing, I would take this ledge over any single ledge, hands down. If you are concerned with keeping things as lightweight as possible, then this is the ledge for you.
|
If you and your partner are a couple of big guys, you might prefer to upsize to the D4 double, which has the same rounded corners but sits flat against the wall like all other double ledges. This ledge flags equally well, and is more-than-burly-enough for a three-man team to hang out on during changeovers and beer breaks.
So which ledge do I prefer? I guess I'll have to spend another hundred nights or so in each ledge, and figure it out. Cheers and beers from the wall, eh? "Pass the Pitons" Pete Zabrok aka. Dr. Piton P.S. A link here for the design geeks: https://bigwalls.net/d4-delta-design-notebook-pages.html |
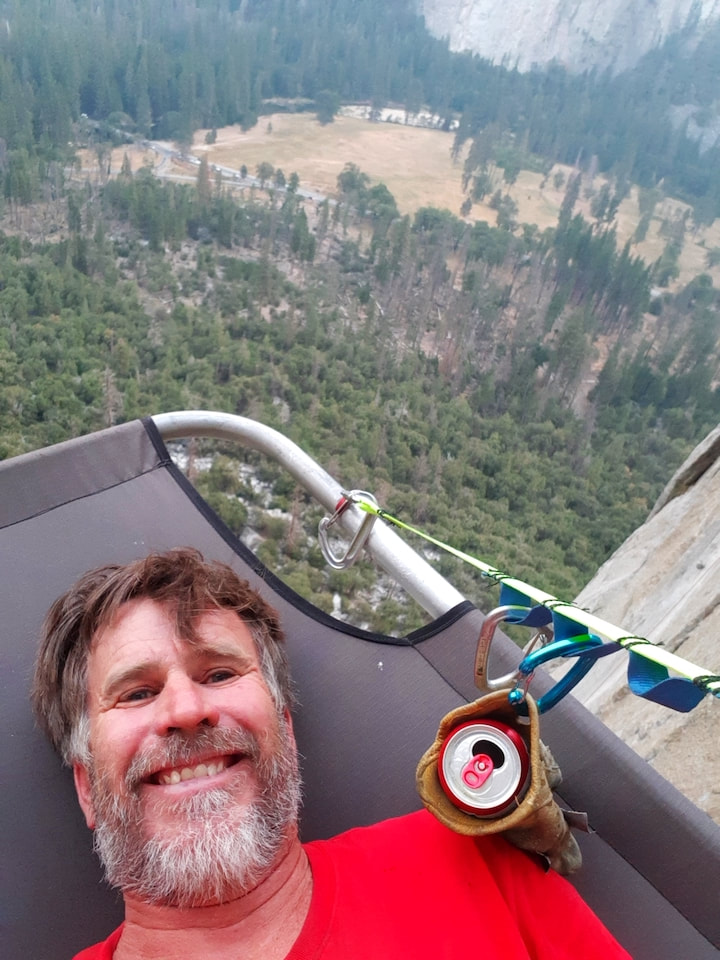
"Cheers and beers from the wall, eh?"
Note Dr. Piton's beer cozy made from glove
|
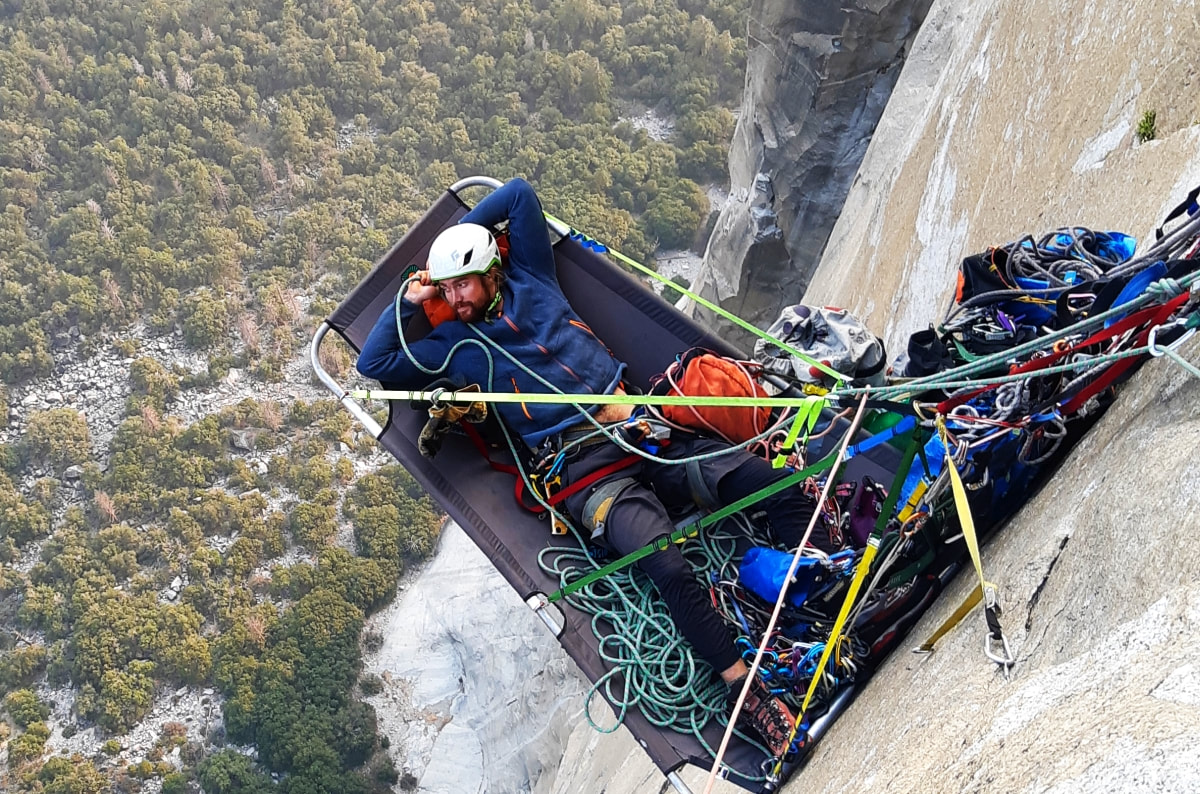
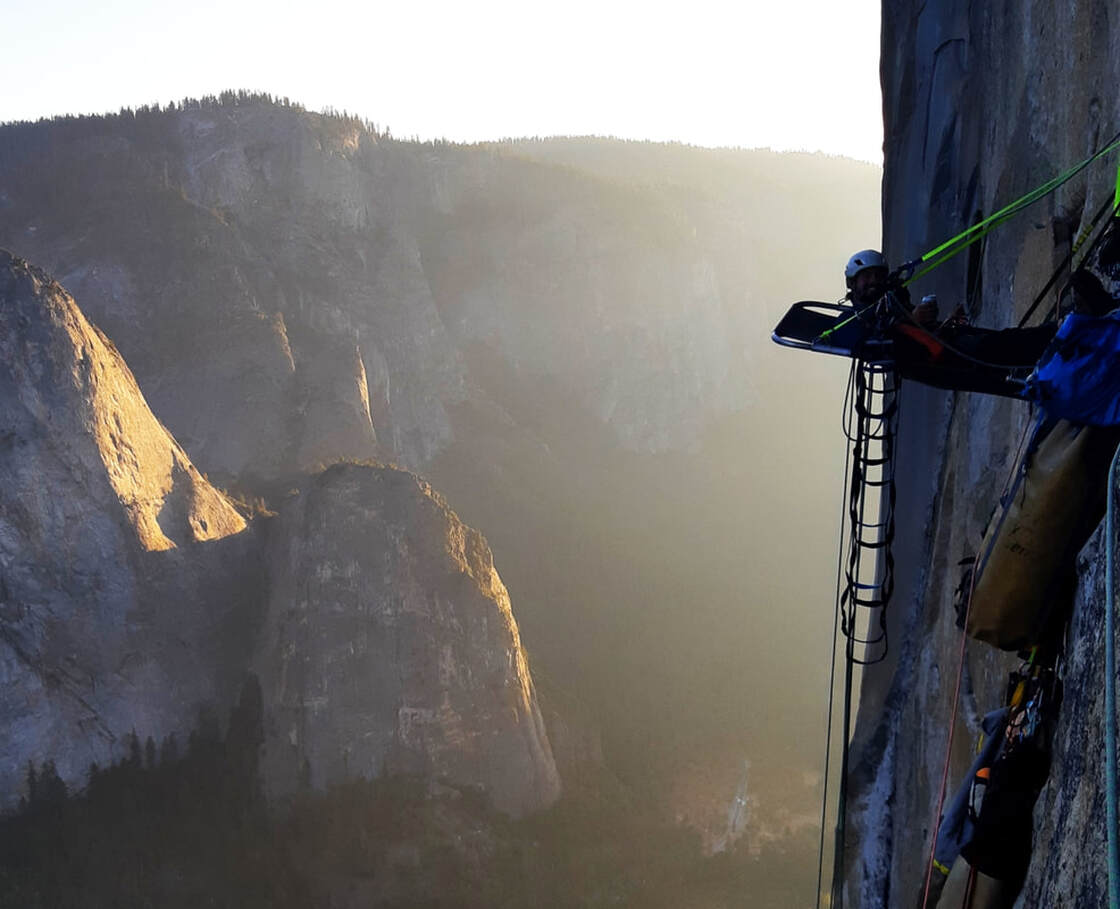 Hayden Robinson relaxing on the Delta2P on "Hockey Night in Canada" on El Capitan, Yosemite, California. Photo credit: Pete Zabrok