Why Warm Up?
Warming up is used to prepare the body to perform better and be more resilient during physical activity. It increases the temperature of the body and the blood flow to the muscles, as well as “primes” the nervous system and tissues associated with the specific movements of the sport. These actions will help prevent injury and improve performance.
The goal of this article is to arm you with some tools for a good warmup that gets the job done quickly.
We will also be looking at the fingers and the primary pulling muscles in the shoulders. And, yes, we might nerd out a bit along the way so you have a good grasp of th principles and apply them as needed. At the end of the article, I also share a video for a crag warm up. So, here we go!
|
|
Principle #1: General to Specific
You have probably heard that the best thing you can do is prepare for the climb is to climb. There is some truth to this, and climbing to warm up is where we will conclude this process. But, in general, climbing is not the best place to optimize out performance and resiliency toward shoulder injury or finger tweaks.
Reason #1 To Not Climb to Warm-Up: Climbing Has a Lot of Variables to Control
You may recall from one of your science classes that uncontrolled variables lead to uncontrolled results. Controlling the variables during your warm up is not very different. If we want to make sure something specific is happening, we need to control everything else to best target our desired outcome. Controlling variables is also how we lower the risk of injury with a body that isn’t ready to try hard just yet!
The first thing we want to do is get the relevant joints moving with some simple circular rotations. Start off with about 3-5 circles (or CARs for my fellow FRC coaches out there or followers of my previous articles) per joint. This gets the fluid moving in and out of the joint so it can increase its functionality. Here is a full video you can follow along with! The video is about 20 minutes long but only due to explanation. You can easily iron this process out to 3-5 minutes. |
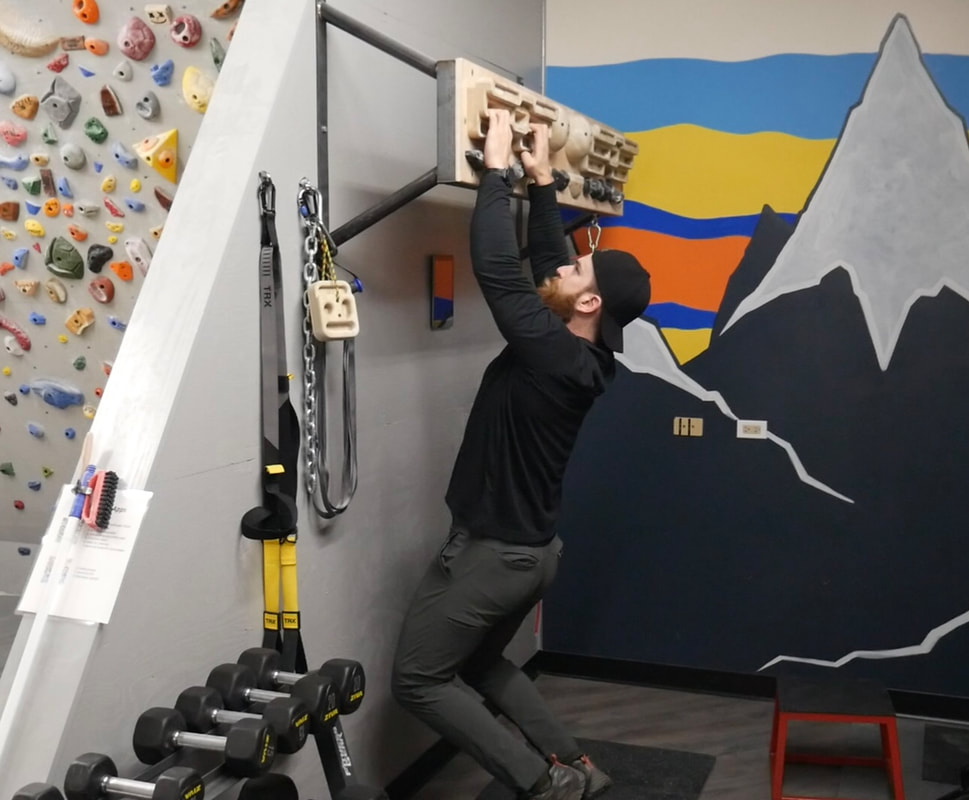
After getting the joints moving, focus on the relevant muscles and tendons. Enter the optimal warm-up tools: the pull-up bar and the hangboard. These tools allow you to appropriately stress your arms and fingers in a controlled environment, evenly distributing the efforts across all of the muscle fibers – i.e. no slopey feet to blow off of and over-stress a muscle or tendon before warming it up. The pull-up bar and hangboard also allow you to work large and smaller muscles in different ways (more on that below.) |
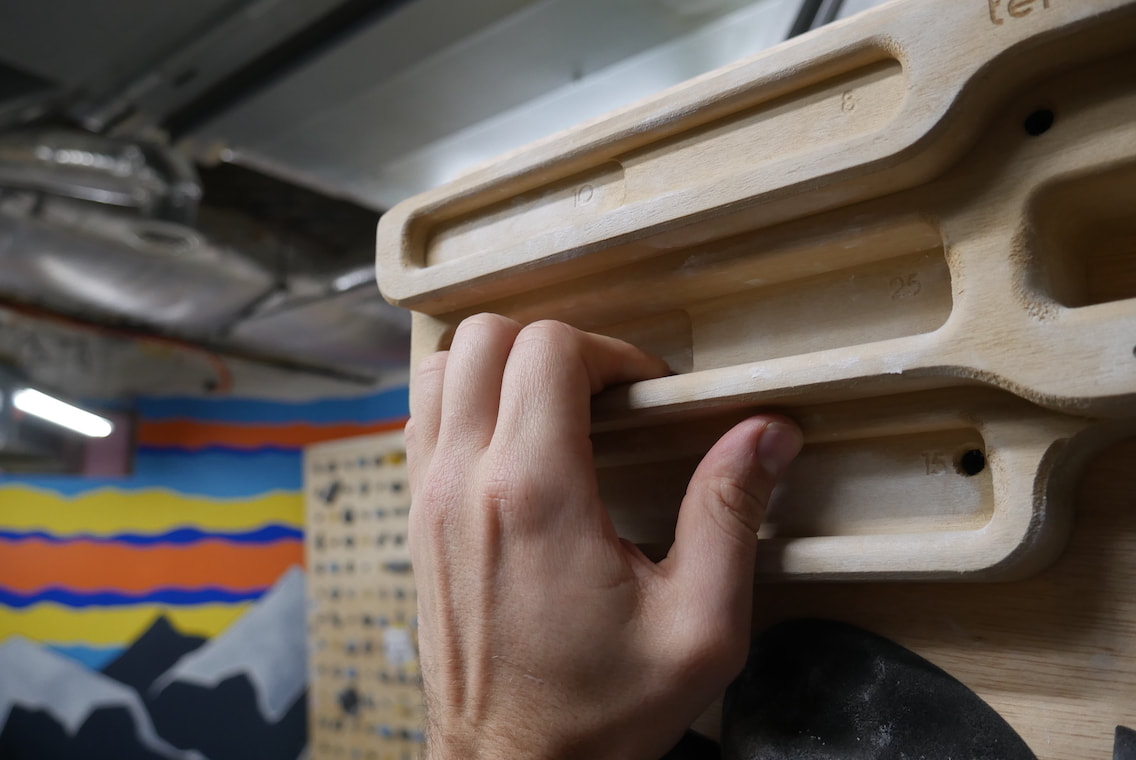
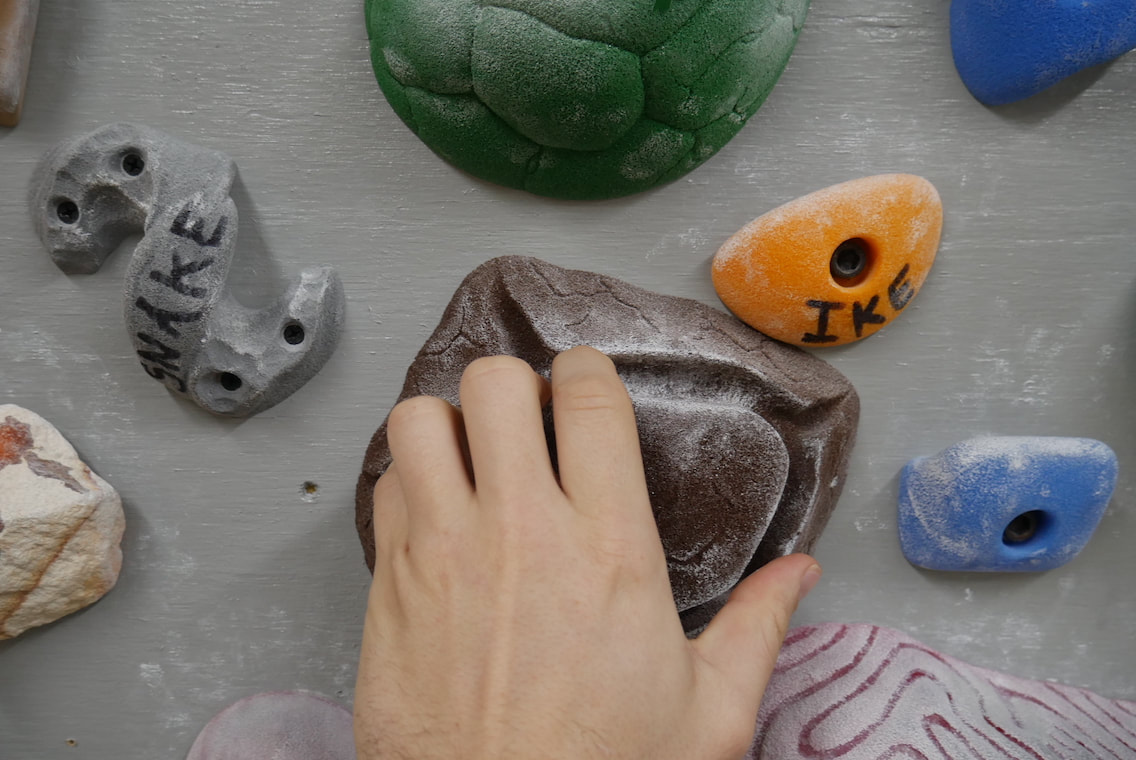
In the photos below, you can see fingers set up on a hangboard and fingers on a climbing hold. The hangboard edges are flat and allow us to position our fingers evenly or however we would like. Let’s say in an optimal scenario we have an even distribution of 25% effort across all fingers.
When climbing, the holds are almost always going to have some type of irregularity to them. You might find yourself looking for nubs, cracks, or points of friction to use the hold well. This may stack, shift, or need less than four fingers, to use efficiently. This means that some fingers may get stressed differently than others during a period where the goal is to get EVERYTHING prepared. (Yes, different bone, finger and hand sizes will not allow perfect distribution of effort even on a hangboard, but imagine how much more chaotic it gets on the wall…)
When climbing, the holds are almost always going to have some type of irregularity to them. You might find yourself looking for nubs, cracks, or points of friction to use the hold well. This may stack, shift, or need less than four fingers, to use efficiently. This means that some fingers may get stressed differently than others during a period where the goal is to get EVERYTHING prepared. (Yes, different bone, finger and hand sizes will not allow perfect distribution of effort even on a hangboard, but imagine how much more chaotic it gets on the wall…)
Reason #2 for saving the wall for last leads us to our next principle for warming up:
Principle #2: Slow to Fast
|
Moving slowly and loading our tissues slowly allows better overall use of our entire muscle. We don’t want any muscle fibers caught off guard. Climbing on the wall usually involves moving pretty quickly (as compared to just hanging). You may have to snatch a hold quickly if a foot slips or you grab a hold that doesn’t work for you. Both of those scenarios are high speed interventions to our muscles. Not exactly where we want to start.
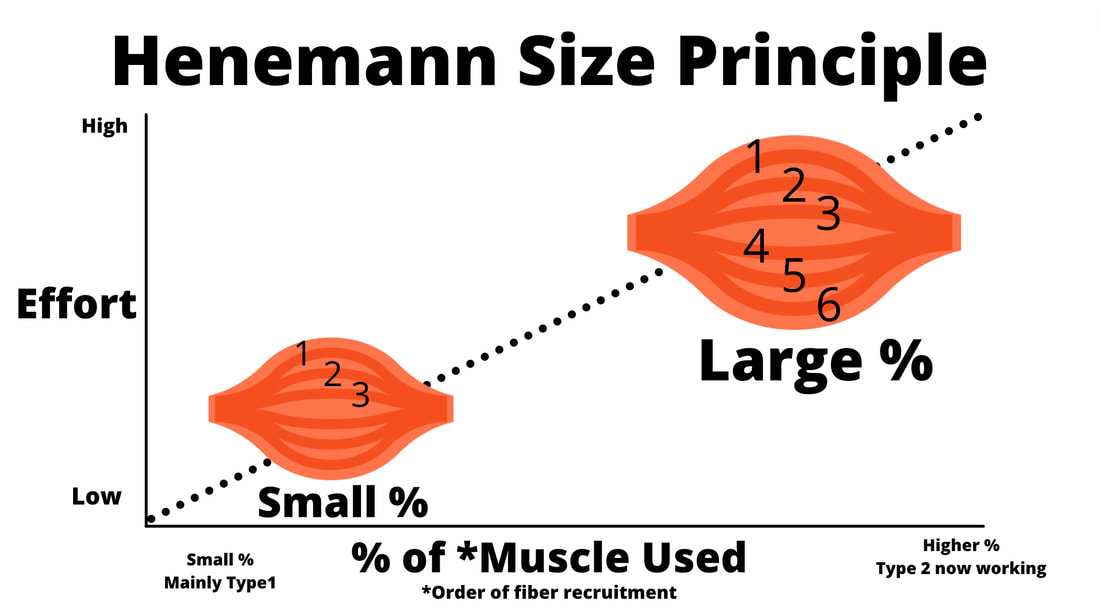
The Heineman Size Principle in your Exercise Science text book says that there is a hierarchy of muscle fibers and how they get used. The heavier and slower the activity, the more of these fibers need to be recruited. Slow equals “all hands on deck." If the warm up is too easy or done at too fast of a speed, we may be leaving parts of the muscle behind and not properly warmed up or prepared. The Heineman Size Principle also has high intensity component, which involves bringing muscles to failure, ensuring we get maximal recruitment of the muscle fibers. That is because easy work can be accomplished by a small percentage of our total muscle. Your brain only wants to use what it needs to get the job done and no more. When we bring our muscles to failure, we also get the maximal recruitment effect of the Henneman Principle. This can be useful for our warm ups. “Why would we want to fail before we even got on the wall?” |
Great question! There is a difference between destroying your body in a 4-hour gym session to reach fatigue and doing a set or two of submaximal hangs to muscular failure - the latter does not take much out of your gas tank for the day.
Submaximal hangs can be done simply by repeating hangs with short rest intervals (like 7 seconds on and 3 seconds off) in-between multiple reps. Eventually, you’ll feel a good pump and won’t be able to effectively hang on. That’s making sure all your fibers are working and ready to go! You can use this interval hanging approach to your fingers and your larger muscles, which brings us to our next principle.
Submaximal hangs can be done simply by repeating hangs with short rest intervals (like 7 seconds on and 3 seconds off) in-between multiple reps. Eventually, you’ll feel a good pump and won’t be able to effectively hang on. That’s making sure all your fibers are working and ready to go! You can use this interval hanging approach to your fingers and your larger muscles, which brings us to our next principle.
|
|
Principle #3: Large Muscles to Small
Moving from large muscles to small one helps ensure that each muscle group is receiving its appropriate dose of warm-up intensity. Let’s see an example of what I mean.
Compare hanging two arms from a pullup bar with hanging two arms from a 20mm edge on your fingers. In which example are you able to hang on longer? Most likely the pull up bar!
With the pull-up bar, your whole hand is wrapped around and your elbows and shoulder are doing most of the work because the fingers don’t have to. It takes a much longer time to reach failure using your elbows and shoulders compared to just your fingers. Hanging on your fingers wouldn’t give enough time for those finger muscles to warm up under tension.
“Can’t I just hang multiple times on my fingers until I sum more time,” you might wonder?
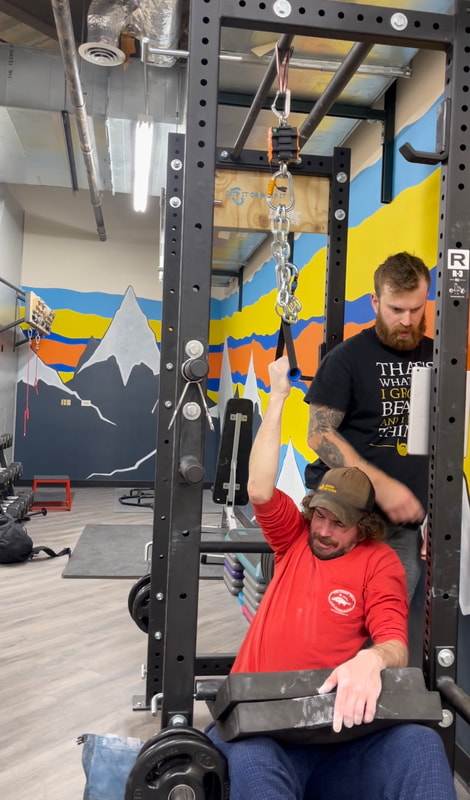
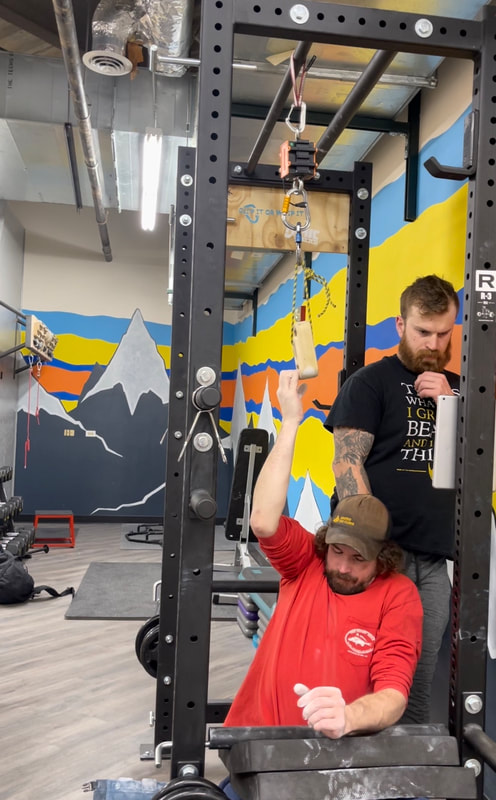
Ok, pull out your calculators class, here are some real strength assessment numbers from my good friend and climbing client Alex. He is pulling on what can be compared to a fancy food scale. The device calculates the amount of force being placed on it. (Refer to my Climbing Finger Strength video which shows how to set up one of these scales.)
Alex weighs about 200 pounds. He first completes a 5-second max pull on a handle and then does a max pull on a 25mm edge. Let's see what his max pull is for each example and consider how that impacts his large versus his small muscles.
It is generally accepted that you must exercise at about 70%-85% of your max to get you towards that maximal recruitment level in your muscle so all of your fibers get to work. Let’s punch some buttons…
Looking at the large muscle recruitment using the handle pull (Image A):
Alex would need to add about 38 pounds to his bodyweight (since he weighs 200 pounds) to meet the minimum effort needed for his muscles to work near max. In this example, Alex should easily be able to hang with 38 pounds on his body since he is capable of producing 340 pounds of total force.
Looking at the finger muscle recruitment using the 25mm edge (Image B):
Alex would need to take off 60 pounds to hit his minimum needed effort for his fingers. Alex might be able to hang for a moment using just his bodyweight but that 200 pounds matches his 100% max strength effort, so it would be very difficult.
Even if Alex is working hard, gets pumped, and is maximally recruiting his finger muscles and tendons while on the hangboard, he is still only working at about 41% of his elbow/shoulder capacity (140/340). That means finger hanging and climbing on his fingers alone isn’t really that intense for his elbows and shoulders. That is why large muscles need to be recruited before small muscles.
And the final take home message...
Looking at the large muscle recruitment using the handle pull (Image A):
- 340 pounds (Alex's max when both arms are summed) x 70% = 238 pounds
Alex would need to add about 38 pounds to his bodyweight (since he weighs 200 pounds) to meet the minimum effort needed for his muscles to work near max. In this example, Alex should easily be able to hang with 38 pounds on his body since he is capable of producing 340 pounds of total force.
Looking at the finger muscle recruitment using the 25mm edge (Image B):
- 200 pounds (Alex's max when both arms are summed) x 70% = 140 pounds
Alex would need to take off 60 pounds to hit his minimum needed effort for his fingers. Alex might be able to hang for a moment using just his bodyweight but that 200 pounds matches his 100% max strength effort, so it would be very difficult.
Even if Alex is working hard, gets pumped, and is maximally recruiting his finger muscles and tendons while on the hangboard, he is still only working at about 41% of his elbow/shoulder capacity (140/340). That means finger hanging and climbing on his fingers alone isn’t really that intense for his elbows and shoulders. That is why large muscles need to be recruited before small muscles.
And the final take home message...
Principle #4: Low Intensity Work to High Intensity
This concept is embedded in some of the other principles discussed above, but it is still important to make explicit. Take a slow, warm-up approach off the wall before getting on the wall. Start with larger edge sizes before moving to smaller edges. Start on easier graded climbs, then work up to your project level grade.
What does this look like?
Let's run you through an example warmup on each piece of equipment so you can clearly see all the principles at work. This entire process will also be found in video format at the end of this section.
What does this look like?
Let's run you through an example warmup on each piece of equipment so you can clearly see all the principles at work. This entire process will also be found in video format at the end of this section.
|
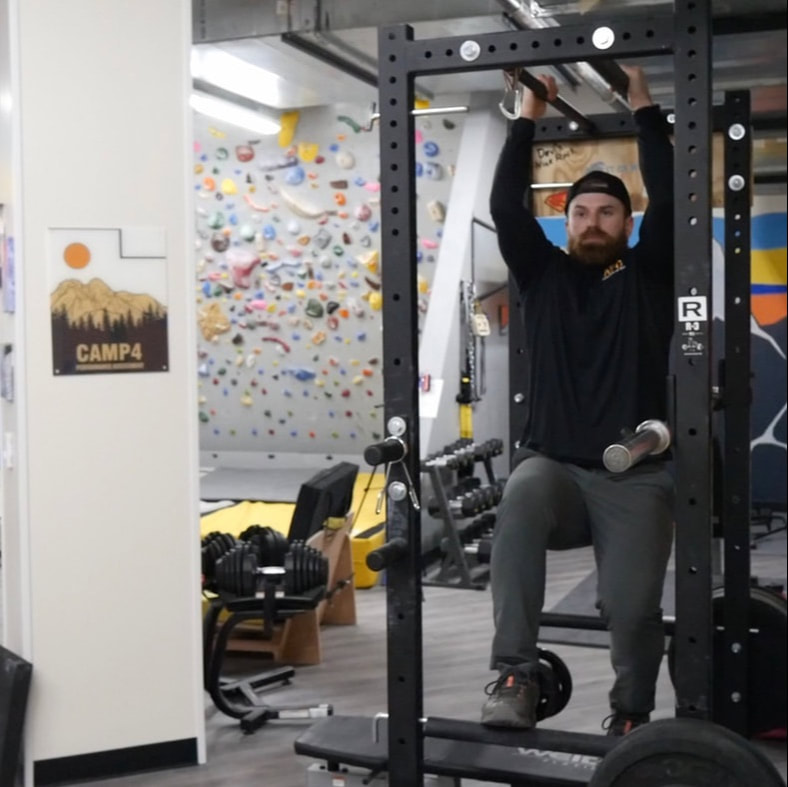
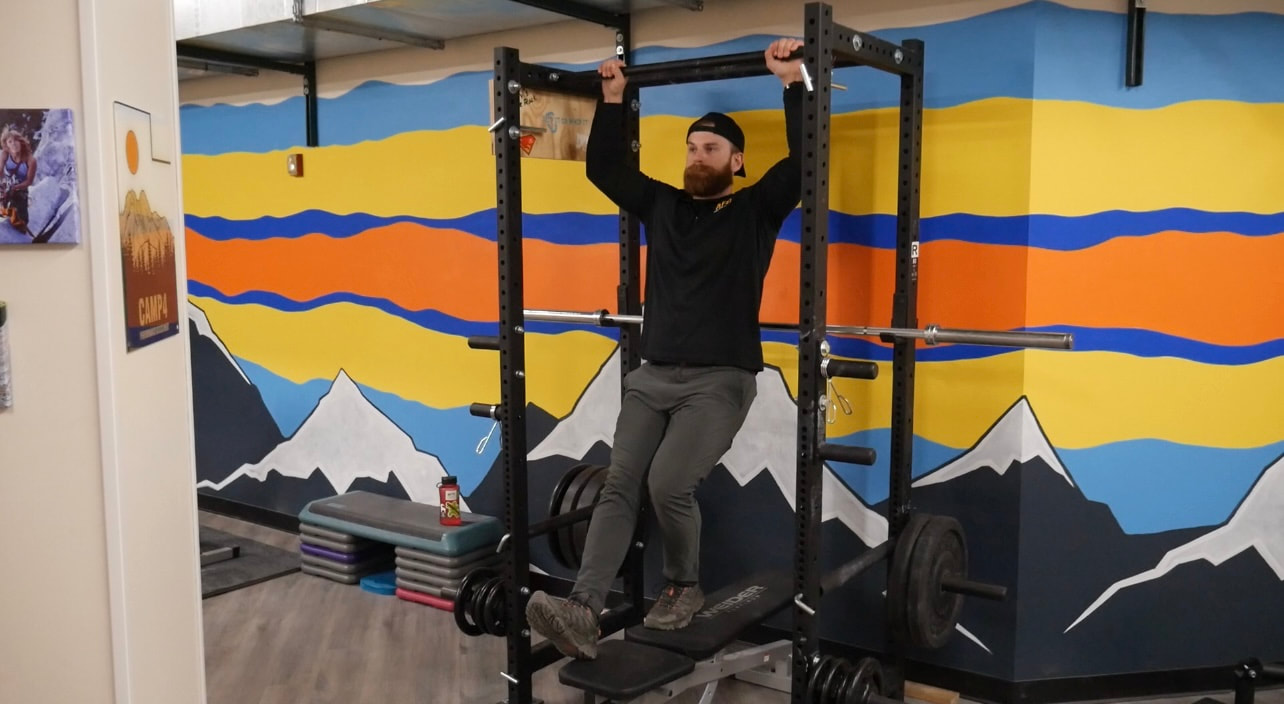
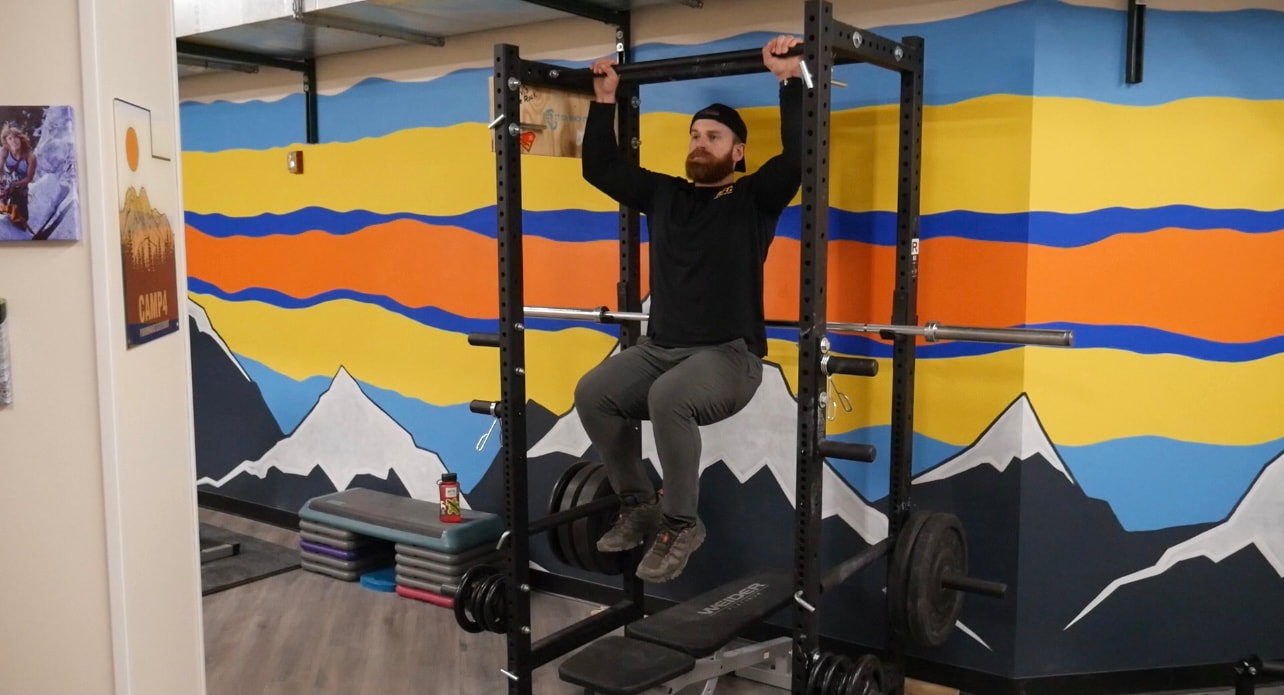
Feet Assisted Hangs at 120 and 90 degrees of elbow bend (low intensity)
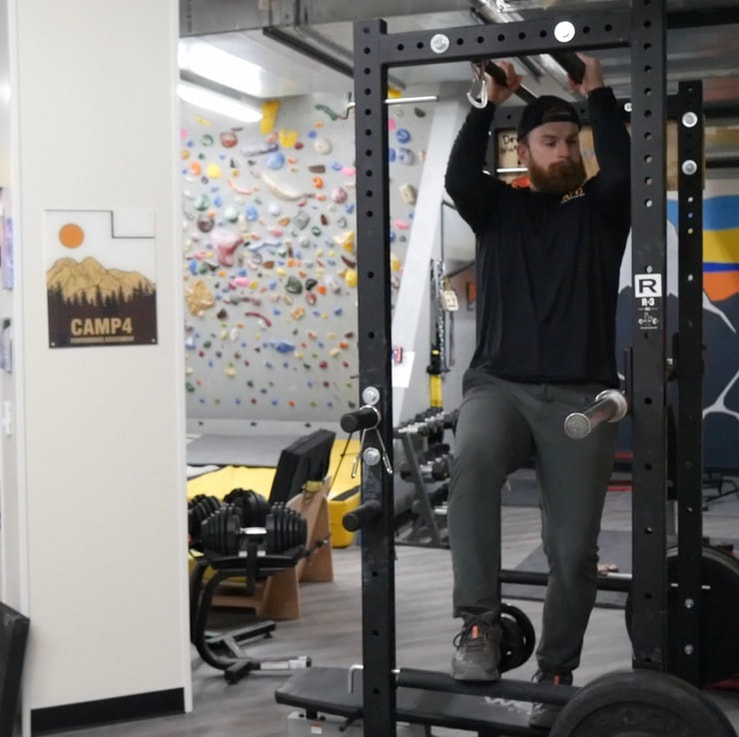
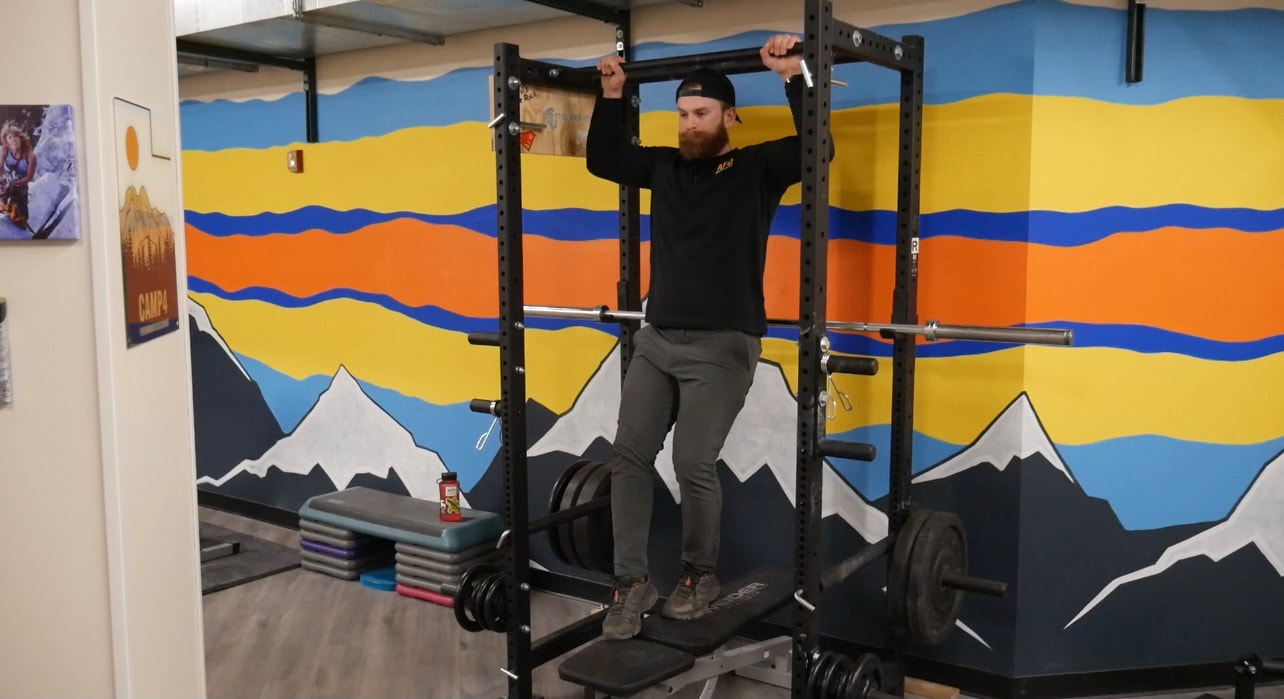
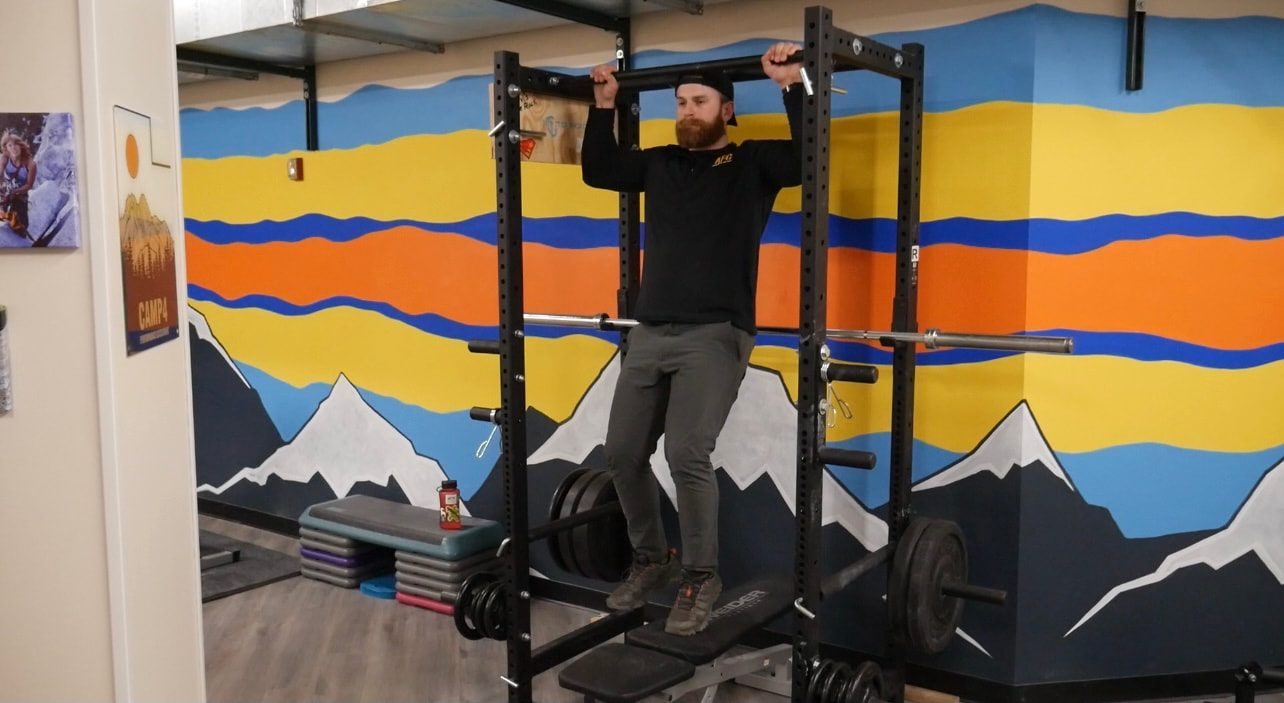
Unassisted Hangs at 120 and 90 degrees of elbow bend (higher intensity)
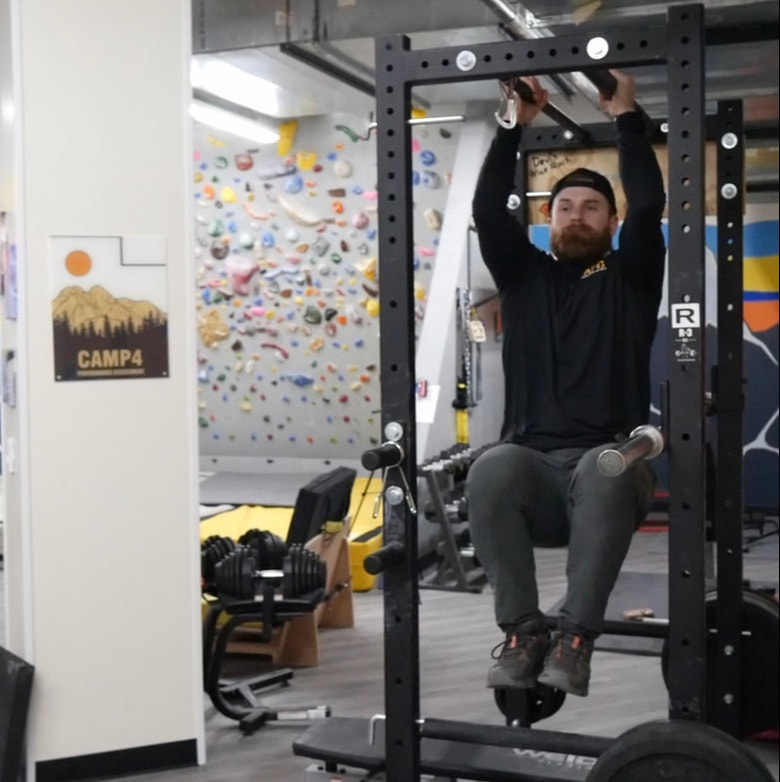
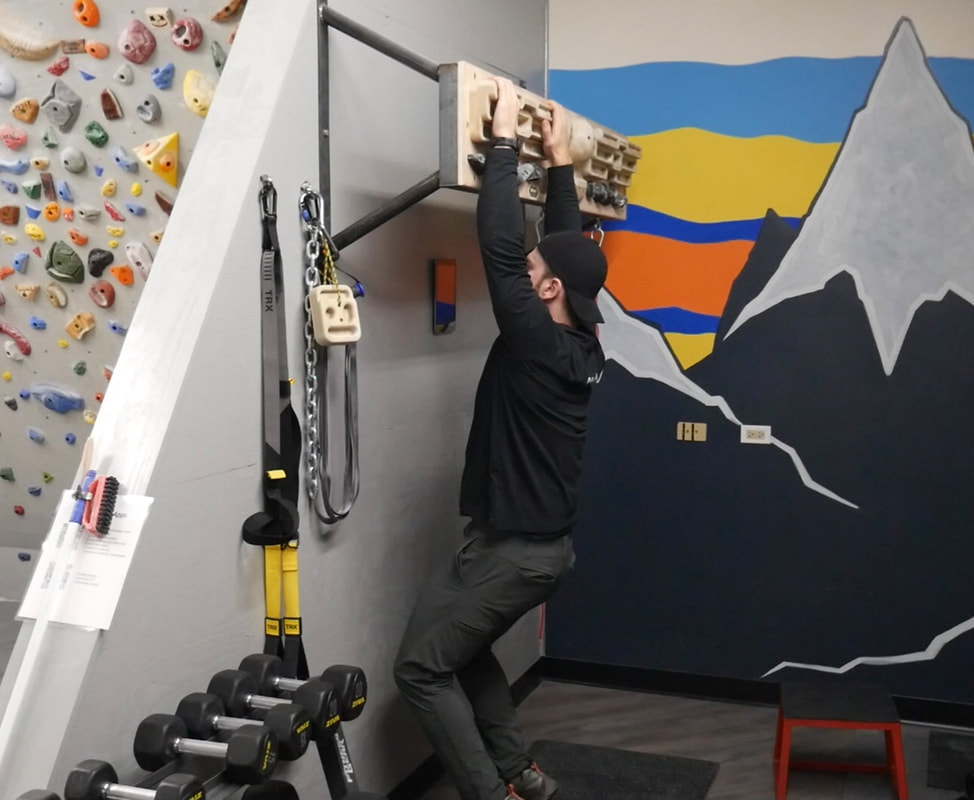
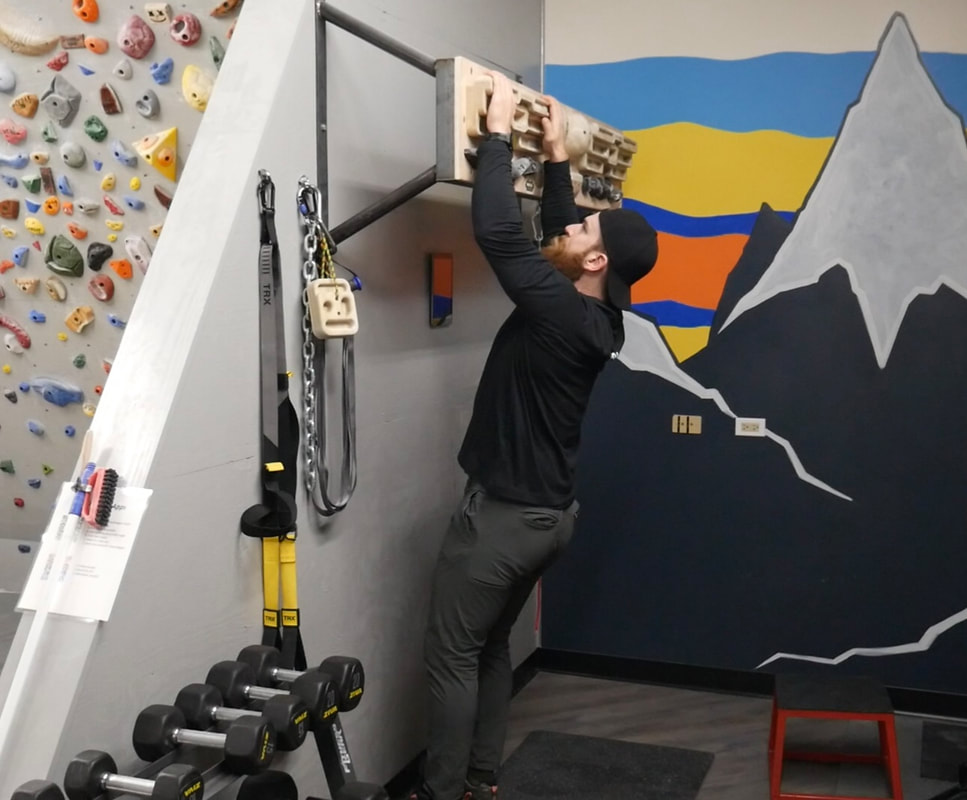
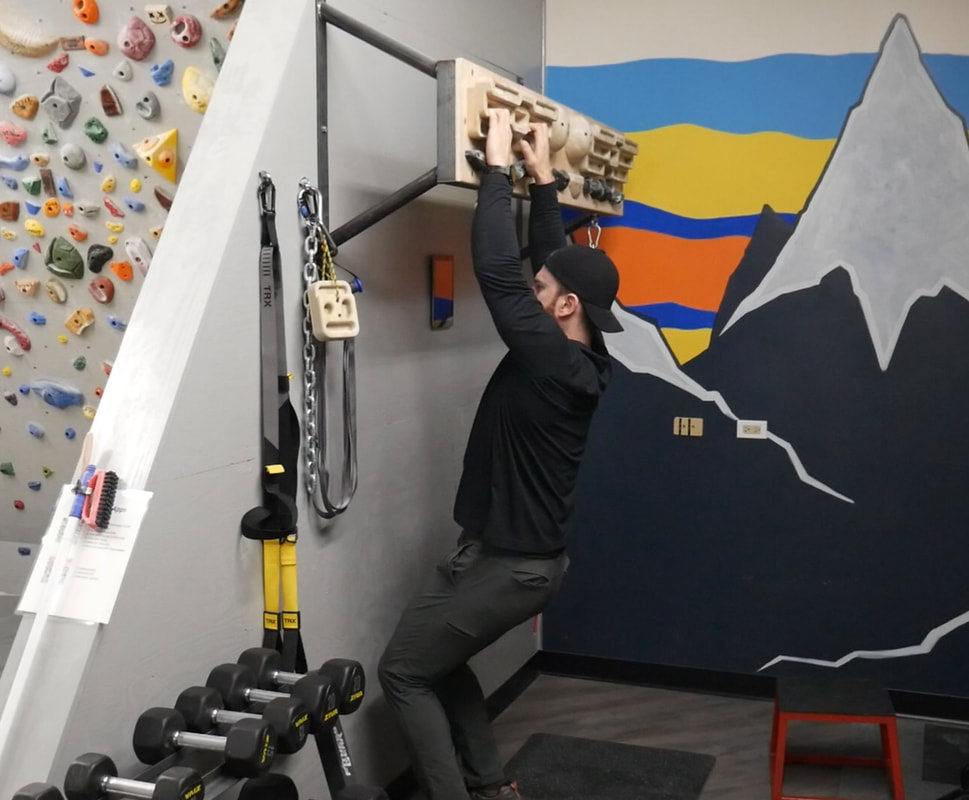
I am hanging here keeping my elbows at large angles (about 120 degrees). This position is less specific to climbing but more friendly to shoulder positioning. I will hang here for about 10 seconds on and 10 seconds off for 2-3 sets. The first set might be with my feet down on the bench or bar to reduce intensity and then I will slowly lift my feet off for the last set or two.
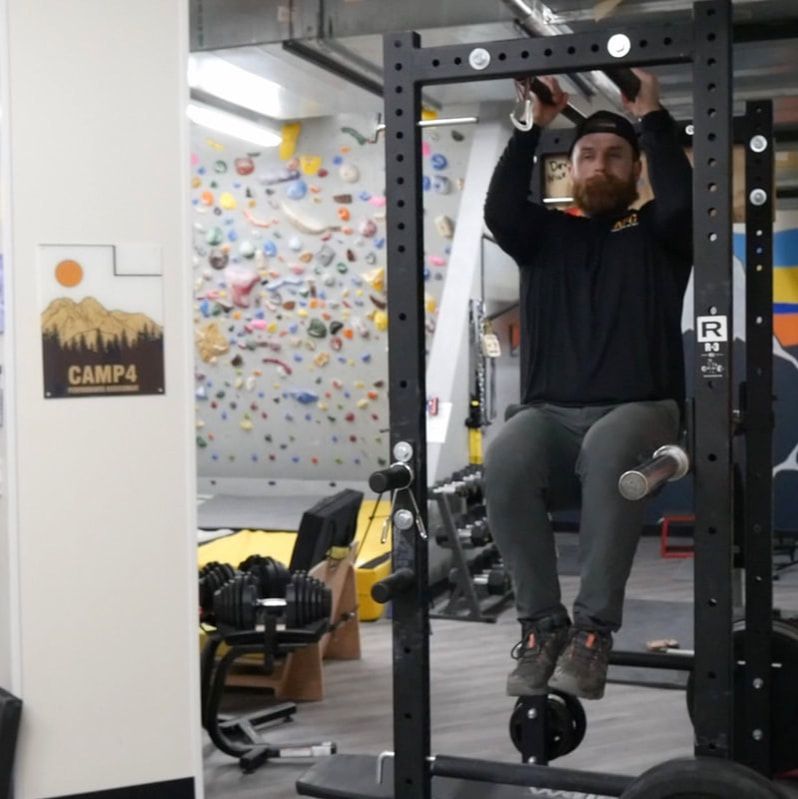
I will repeat this process for a hang with my elbows at 90 degrees. This is a more intense position for the shoulders and as such follows the larger elbow angle set.
I end my large muscle warmup with a more climbing specific hold with the overhand grip (palms facing the direction I am looking) and repeat the same process starting at the larger elbow angles and progressing to the un-assisted 90 degree overhand hang.
Feet Assisted Hangs (palms facing forward) at 120 and 90 degrees of elbow bend (low intensity)
Unassisted Hangs (palms facing forward) at 120 and 90 degrees of elbow bend (higher intensity)
This process takes about five minutes.
You can then move into a “recruitment set,” or failure attempt, via repeat hangs or even some slow isotonic (moving through range of motion) pull ups. These again would be done slowly but would also be a good alternative to getting the elbows and shoulders ready to go.
Example: Hang on bar or jugs of hangboard for 5-7 seconds and rest about 3 seconds and repeat until near failure. You should be pretty pumped. At this point you will rest for about 2-3 minutesand move on to the fingers.
This process accumulates another approximately 5 minutes..
Warm-Up Video Hang Bar
|
|
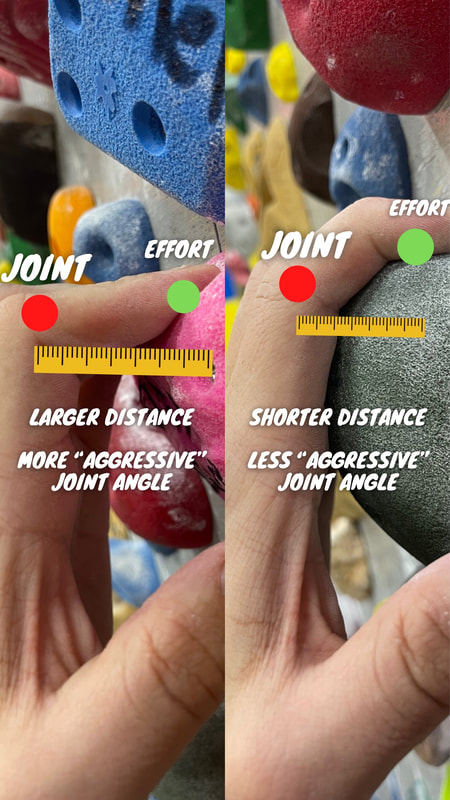
For the fingers we will use the same methods and principles. Start with low-to-moderate intensity finger positions before moving towards more intense options. Open hand or sloping grips are “less aggressive” and should be used before moving to a half crimp on smaller edges. Crimps place more stress on the joints (specifically that knuckle joint the PIP, or proximal interphalangeal joint.) This isn’t bad, it just needs to be slowly progressed towards.
The open hand position shortens the distance between the effort of your finger tips and the working joints. Imagine holding a jug of milk close to your body. Now, hold it as far away as you can. It gets "heavier", not from physical weight but because of the distance from the working joints/muscles. It also creates a larger angle towards the working joint that also reduces the stress, where the crimp is about 90 degrees which is near maximal potential stress. Hold that milk jug with a straight arm just a few inches off of your leg. Now, hold it directly in front of you with your arm parallel to the ground. It gets "heavier" again... I will begin with a low intensity option for the fingers via an open hand grip on the sloping edge of the top jug on the hangboard. Again, about 10 seconds on and off for 2-3 sets should get the beginnings of a pump going. (You may need to add or subtract weight during this time depending upon your strength. The goal is a low/moderate intensity working towards a high intensity effort. This is relative to everyone individually.) Another approximately 5 minute process, total time thus far is about 15 minutes. By this point you should be pretty pumped in the forearms as well as the rest of the upper body. Now you can transition into more speed and specific work to finish the warm-up. On the hangboard first choose the jugs to return to the large muscle groups and do 3-5 reps of pull ups with the intent to move quickly.Follow that with 2-3 rapid catches on the jugs to really prime the nervous system and muscles to be ready to respond quickly to dynamic movement.Repeat this process using large edges (25-30 mm). |
Assisted and Unassisted Open-Hand Hangs - Hangboard
Assisted and Unassisted Half-Crimp Hangs - Hangboard
Warm-up Video Hangboard
Approximately 5 minute process. Total time is about 20 minutes.
By now, you should have maximally recruited and prepared all fibers that will be involved in your climbing to come, as well as get them nice and snappy for any dynamic movement. Now we can get on the wall!
We can extend our warm-up on the wall using the same principles. An example on-the-wall warm-up may look like:
Climb Slowly:
Climbing Wall Warm-Up
Your final step in your climbing is to spice it up with some dynamic movement. Skip some holds on climbs or plan out big moves on a spray wall (like shown in the video below) and you will have completed a pretty thorough warm up to increase your ability climb well, but also to prime your body to be resilient too!
By now, you should have maximally recruited and prepared all fibers that will be involved in your climbing to come, as well as get them nice and snappy for any dynamic movement. Now we can get on the wall!
We can extend our warm-up on the wall using the same principles. An example on-the-wall warm-up may look like:
Climb Slowly:
- large holds, large feet.
- medium holds, large feet.
- small holds, large feet.
- large hands, medium feet.
- medium holds, medium feet
- small holds, small feet
Climbing Wall Warm-Up
Your final step in your climbing is to spice it up with some dynamic movement. Skip some holds on climbs or plan out big moves on a spray wall (like shown in the video below) and you will have completed a pretty thorough warm up to increase your ability climb well, but also to prime your body to be resilient too!
BUT, WHAT IF I AM AT A CRAG?!?!
The principles don’t change, only the methods. Here you might have to get creative using rocks, or trees. However, there are also nice toys like Tension blocks or flashboards that we can quickly sling to an overhead bolt, tree, or even our foot. Below is another video below for your entertainment and education, and here is a warm-up series for the crag.
The principles don’t change, only the methods. Here you might have to get creative using rocks, or trees. However, there are also nice toys like Tension blocks or flashboards that we can quickly sling to an overhead bolt, tree, or even our foot. Below is another video below for your entertainment and education, and here is a warm-up series for the crag.
If a flashboard is hung up on a bolt or tree:
+ 10 seconds on and off for 2-3 rounds per muscle group (get some pump going).
+ Start with your hands fully wrapped around the board for the larger muscles, work your way to the fingers on the edges.
If the flashboard is wrapped around your foot:
+ Pull at about 80% effort for 10 seconds on and off for 2-3 rounds.
+ Progress to 90-100% effort for 3-5 seconds on and 3-5 seconds off.
+ Start with your hands fully wrapped around the board for the larger muscles, work your way to the fingers on the edges.
Climbing Wall Warm-Up |
Simple Flashboard Warm-Up (For the Crag) |
Collin McGee is a Camp4 Human Performance coach with Dr. Tyler Nelson and is part of the new Camp4 Injury Prevention Program.

