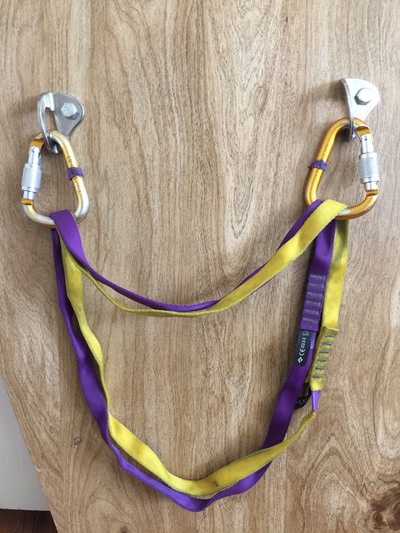
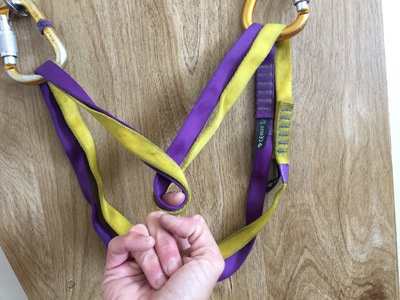
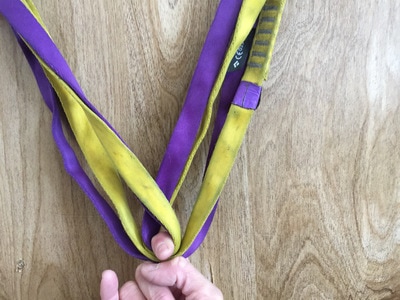
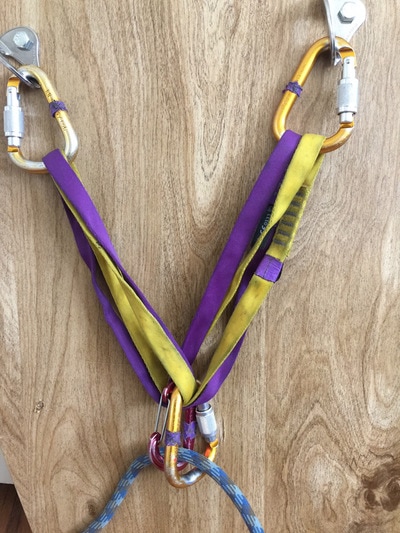
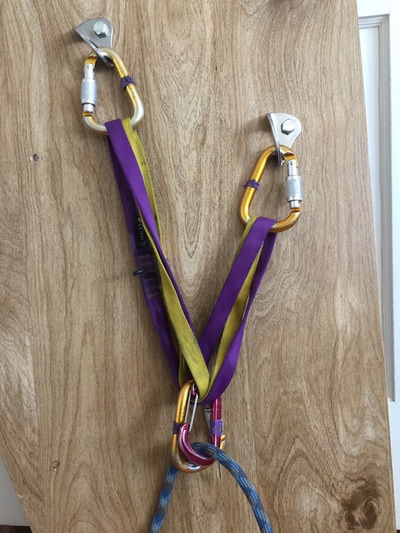
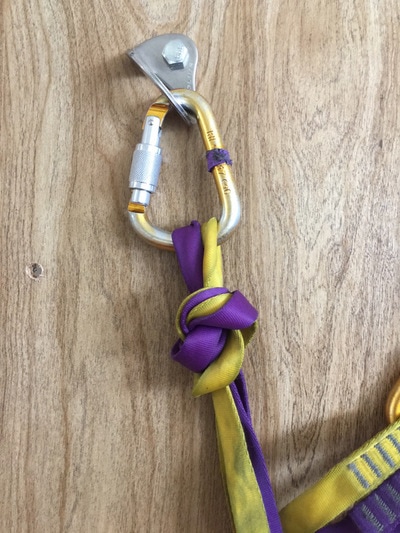
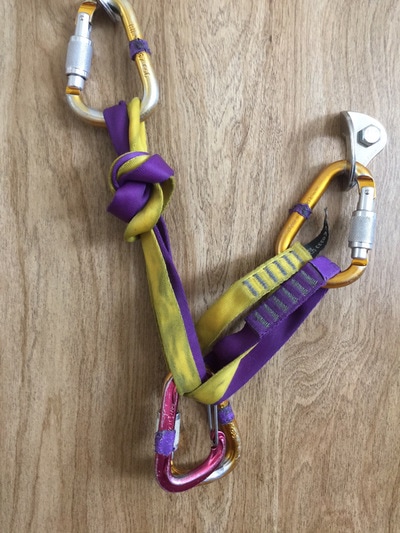
The sliding-x anchor is a quick and easy anchor to build. Its biggest advantage is the ability to quickly and easily equalize (which means the weight/load is equally distributed across all points of the anchor). From a SERENE perspective, its primary disadvantage is that if a bolt or anchor point broke, the anchor will "extend," which adds additional force to the other anchor point. The "extension" can be mitigated by using shorter webbing (but be careful not to get too short - you want a downward pull on the webbing and bolts NOT a sideways pull) or tying a knot or knots into to the webbing. Refer to the photos and video for visuals.
How to make the sliding-x anchor SERENE:
S = Solid = Make sure the anchor is build on solid points.
E = Equalize = This is a self-equalizing anchor (i.e. the weight/force is equally distributed across the anchor points). If you are top roping different routes off one anchor the sliding-x adjusts with the direction of the rope pull. This anchor also works well when anchor bolts are off-set.
R = Redundant = Use two pieces of equal-sized webbing, attach to two locking carabiners (one in each) bolt plates, use two carabiners at the bottom of the anchor (where the rope passes through).
E = Efficient = The sliding-x anchor is quick to build.
NE = No Extension = This is the weak point of this anchor, but you can minimize extension by using shorter webbing (not too small though, you want force to pull downwards) or by tying a knot/knots on one or both sides of the anchor (depending on the length of the webbing).
|
|
Sliding-X Photo Tutorial
Sliding-X Video Basic Tutorial
Advantages and Disadvantages of the Sliding-X
Photo 1: Advantage - When anchors are off-set, the sliding-x self-equalizes.
Photos 2 & 3: Disadvantage - If one of the bots fails, then the sliding-x anchor will "extend", which means the anchor point will travel down the length of the webbing until it stops, which will increase the impact force on the remaining bolt. If the webbing is shorter, the travel distance is less. If the webbing is long, you can tie a knot in the webbing to decrease the travel distance.
Video: (1) Demonstrates equalization and (2) no-extension using a knot.
NOTE: You can position the knot closer to the master-point (where the rope goes through the anchor) to further limit extension, but then you will trade off the lateral slide for equalization (i.e. the sliding-x slides a shorter distance). Such choices end up being personal and often argued between climbers (climbers also argue that putting knots in webbing weakens the webbing, which is true...).
|
|
|

